Overlanding is vehicle-based camping that turns the drive into part of the trip, and it’s easier to start than it looks. You don’t need a fully built rig, just a few key pieces to get you started. Overlanding basics cover four areas: sleep, storage, recovery, and power. This guide walks through each one in a sensible build order, with the outdoor recreation gear to match, so you can spread the cost over time.
Start With These Four Overlanding Essentials
The beginner overlander should start with several essentials. They are as follows:
- Sleep: A rooftop or ground tent with sleeping bags rated for the nights you expect. Good rest keeps a multi-day trip enjoyable.
- Storage: Roof racks, a bed rack, or a hitch carrier to haul your kit and keep it secured.
- Traction and recovery: Boards and a basic kit for the first time a tire sinks into sand or mud.
- Camp power: A power station and lighting to keep phones, a fridge, and camp running after dark.
Start with the gear your first few trips call for, then add pieces as you learn what’s missing. Depending on where you travel, that might mean recovery gear before a rack or a power station. Building your overlanding gear this way keeps the cost manageable across a few seasons.
Choosing a Roof-Top Tent or a Ground Tent
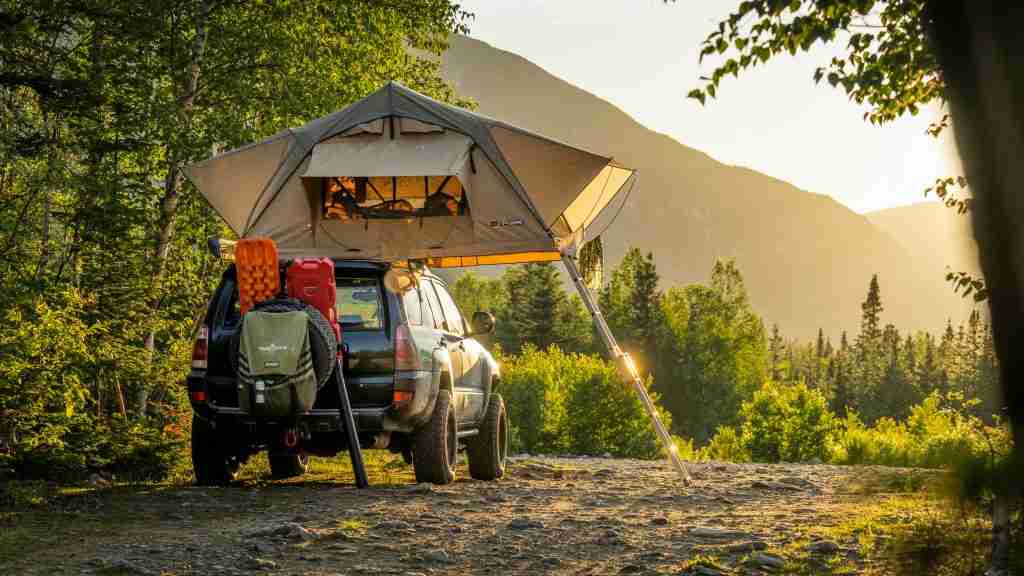
Your sleep setup is the first real decision, and for most people it comes down to a roof-top tent vs a ground tent. Roof-top tents mount to a compatible crossbar, platform, or bed-rack system and make for a quick and easy setup, folding open in minutes. They keep the sleeping platform off wet ground. Hard-shell models set up fast and pack down compact, while soft-shell versions cost less and open into a larger sleeping area.
Before you commit, it’s worth confirming that your vehicle, rack, crossbars, and hardware are all rated for the tent. The dynamic rating is what your setup can carry while you’re driving, and the static rating is what it holds once you’re parked and asleep. Those limits come from the vehicle, rack, and tent makers, and the lowest one sets your ceiling.
A ground tent keeps things cheaper and more flexible. It costs less, works with any vehicle, and lets you leave camp set up while you explore. That makes it a great fit if you park in one spot for several nights. Whichever way you go, weather protection and easy setup matter more than features you’ll rarely use. Warm sleeping bags matter too, since nights turn cold at elevation even in summer. Omni’s camping tents include vehicle roof-top options if you’d rather sleep up top.
Storage and Racks for Your Overlanding Gear
The next thing after figuring out your shelter is how to haul your kit without it shifting all over the trail. A good rack turns loose gear into a secured load. Roof racks and crossbars carry rooftop tents, awnings, and cargo boxes up top. Bed racks and drawer systems keep heavier items low, which helps your center of gravity on rough terrain. Hitch cargo racks ride off the back for the bulky loads you’d rather not lift overhead. A folding option like the GearCage T6 cargo rack is rated for up to 300 pounds and folds up for garage clearance when it’s empty. Since the carrier itself weighs about 90 pounds, check that the rack plus your cargo stays within your vehicle and hitch’s tongue-weight limits.
The right rack matches your vehicle and your cargo. Measure your roof or bed, note the weight rating, and think through what you’ll carry, from chairs to a fridge and a week of food. Heavy items ride best low and centered, held down with load-rated straps on solid anchor points. It pays to recheck the load after the first few miles, since straps loosen on rough roads. On a hitch carrier, keep your cargo clear of the license plate and taillights. An awning is a popular first add-on that bolts to the same rack for quick shade. Traction board mounts attach the same way, keeping your boards secured and within reach.
Traction Boards and Recovery Gear
Even careful drivers lose traction in loose sand, mud, or snow, and traction boards are the simplest way out. Many overlanders buy the best traction boards they can afford before any other recovery gear. They do their best work when you stop early, before you’ve spun the tires and dug in deeper.
When you’re stuck, figure out why first. If the rig is high-centered, buried to the axles, or resting on an obstacle, boards alone may not free it. Otherwise, clear the loose material, wedge a board firmly under each wheel that needs grip, and ease onto the throttle in your intended direction. Follow the board maker’s instructions, and keep everyone well back while the vehicle moves.
Boards aren’t a substitute for reading the terrain or carrying basic tire equipment, though. A short kit covers most situations:
- Shovel for digging out a buried tire
- Gloves to protect your hands during a messy recovery
- Tire gauge and compressor for airing down and reinflating
- Tire-repair kit, since punctures strand more trips than mud does
Not every beginner even needs boards. On maintained campground roads, a tire-repair kit, compressor, or roadside-assistance plan may matter more. Airing down helps traction on soft surfaces, but keep a reliable gauge, stay within safe limits for your tires and wheels, and carry a way to reinflate before pavement.
Bigger recoveries call for more care. Kinetic ropes and snatch straps stretch under load and build up serious force. They belong only with properly rated equipment, rated recovery points, and someone who knows the technique. Never attach one to a tow ball, tie-down loop, or other unrated point, and keep everyone clear of the recovery area. A dynamic recovery is worth learning hands-on rather than from a paragraph. Groups like Tread Lightly! share simple principles for protecting trails and staying safe. Omni Outdoor Living’s camping and overland collection has plenty of gear to round out your kit.
Power and Lighting at Camp
A portable power station keeps your phones charged, runs a 12V fridge, and powers your lights without idling the engine. The trick is sizing it by watt-hours rather than a vague label like mid-size. Add up each device’s daily watt-hour draw, multiply by the days between charges, and pad it 20 to 30 percent for weather and losses. A fridge is usually the biggest draw, and heat or poor airflow pushes it higher. A compatible folding solar panel can stretch the time between recharges when the sun cooperates, though real output swings with weather, shade, and season.
Lighting works best in layers. A bright area light covers camp chores and cooking, and a warm lantern makes the space feel livable. A couple of rechargeable headlamps free up your hands after dark. When you can, run a 12V fridge straight from the station’s regulated DC output instead of an AC adapter, since converting power twice just wastes it. USB ports and a 12V socket handle the charging that doesn’t need AC, and a small battery pack makes a handy backup. Omni’s power inverter and portable power options are a good place to start, ideally paired with lights that recharge from the same source.
Putting Your Overlanding Gear for Beginners Kit Together
Your first route sets the priorities, usually sleep and safety gear before anything else. Storage, recovery, and power can come as your trips get longer or more remote. Spend where safety matters, like recovery gear and solid mounts, and save on the extras you can upgrade later.
A little planning helps, too. Before you leave, check your fuel range and stations, water, fire restrictions, and flood or storm risk. An offline map, a shared route, and a communication plan beyond cell range round out the prep. Payload, tire condition, and any seasonal closures or permits belong there too.
None of this comes together overnight. Cover the four essentials, and your overlanding gear for beginners kit will fill out as you go. Start with one solid piece and a reachable route, then let the trips teach you the rest.
Frequently Asked Questions
What’s the difference between overlanding and car camping?
Car camping usually means driving to an established site and using the vehicle mainly for transport and storage. Overlanding leans into self-sufficient, vehicle-based travel, often across multiple stops or remote routes. It can include off-road driving, but it doesn’t have to.
Do I need a roof-top tent?
Not at all. A ground tent works fine and costs less, especially if you camp in one spot for a few nights. A roof-top tent makes more sense if you move daily and want a fast, off-the-ground setup your rack and vehicle can handle.
Are traction boards worth it?
For most beginners, yes. They’re simple to use and effective in sand, mud, or snow without a winch. Still, it’s worth practicing with them before you rely on them somewhere remote, and they won’t solve every situation.
What size rack do I need?
That depends on your roof or bed length, your vehicle’s weight rating, and the gear you plan to carry. Confirm both the dynamic and static load limits before you mount a roof-top tent. The dynamic rating covers the tent and hardware while driving, while the static rating also accounts for the sleepers and gear at camp.
Experience Outdoor Living!
At Omni Outdoor Living, we make it our mission to help customers get the most out of their outdoor experiences. We offer quality outdoor products focused on outdoor recreation, DIY projects, entertaining friends and family, or just relaxing outside.